

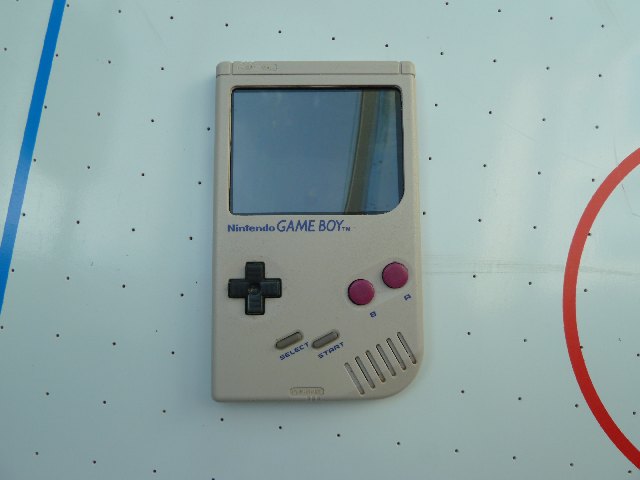
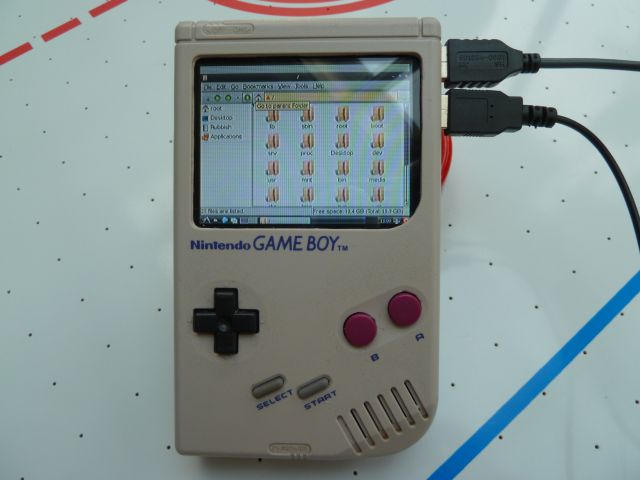
In my secret laboratory I have worked hard for the last couple of weeks to finish my newest creation -> the GAME PI
And today I can show you some pictures and video of the wolf in sheep's clothing.
ALIVE! -- IT'S ALIVE!! Muhahaha
As my little helper I want to give a big "Thank you" to my assistent Dr.Emel who was always a work maniac when it was his turn to work on the project.
And another huge "Thank you" goes to Retroman for the great idea for that conversion!
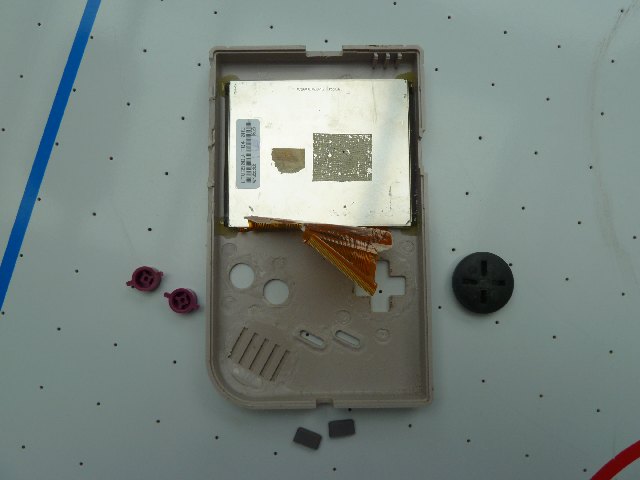
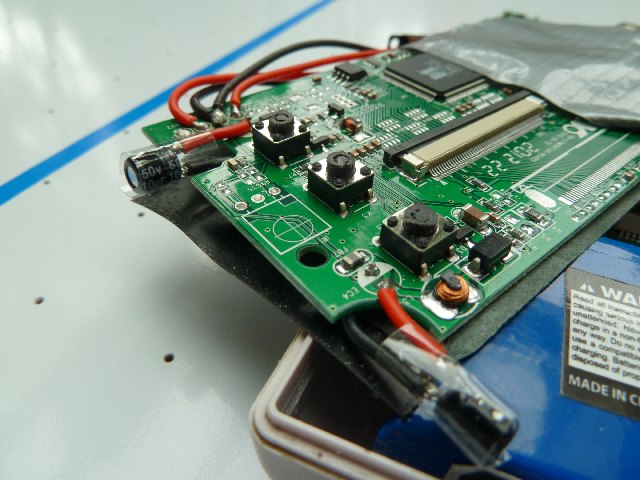
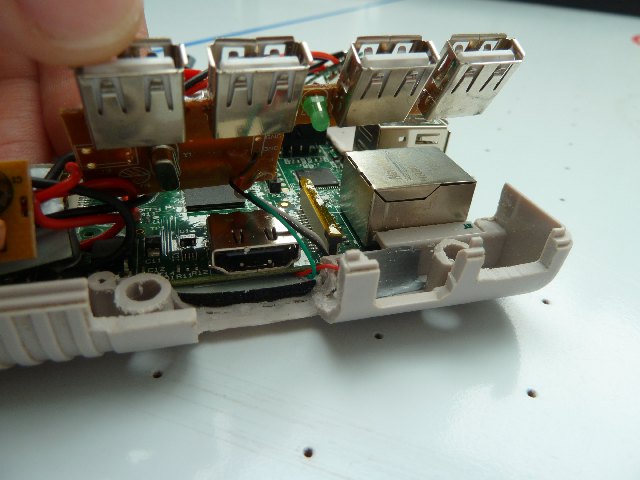
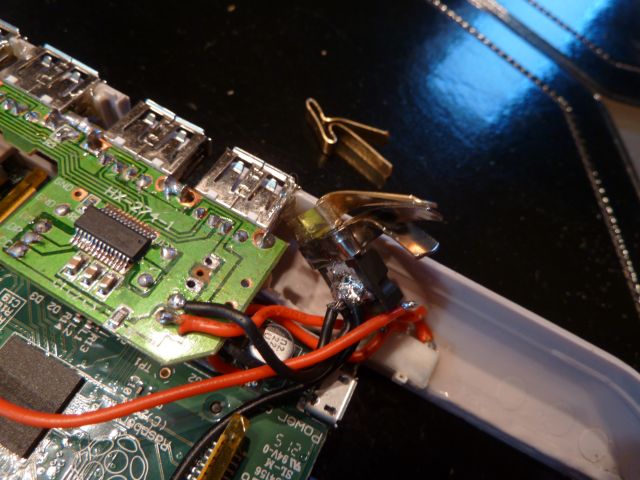
Here are some pictures of the work in progress. All the mounting tabs and most of the plastic parts inside the GameBoy had to be removed to fit in the 3.5" display and all the boards.
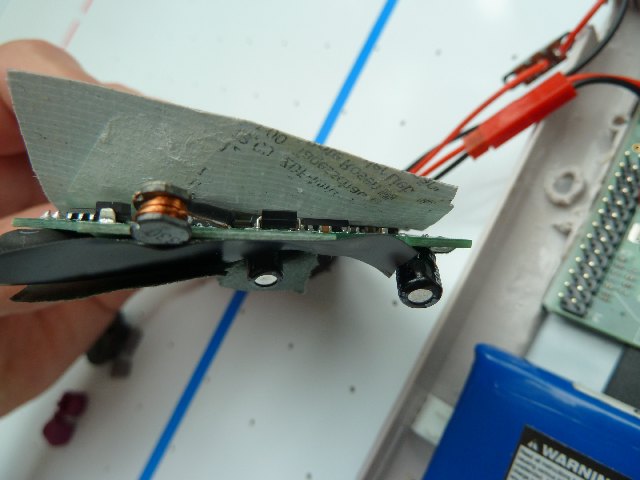
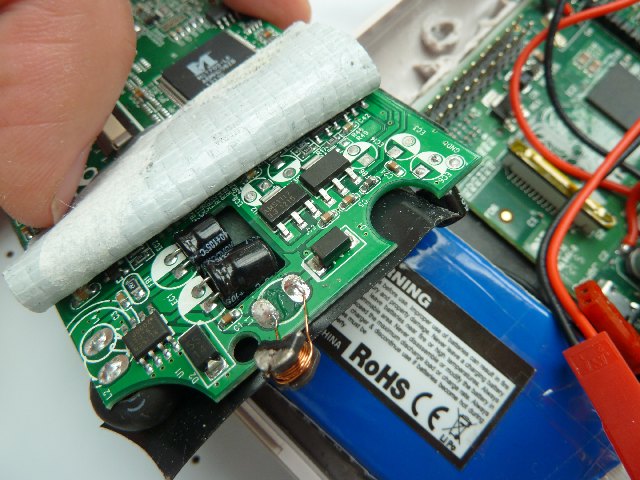
The major problem was the controller PCB of the display. I had to desolder some of the capacitors and a coil and move them to other places or the backside. I had to cut down the three menu control push-buttons.
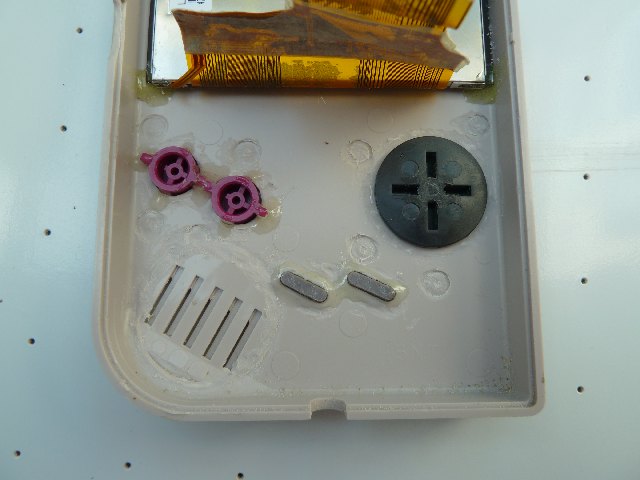
My plans were to use the original front buttons of the GameBoy but they wasted to much space inside with the original PCB. I had to ask Dr.Emel to do some destructive work and after that the buttons were glued in to give the authentic look from the outside.
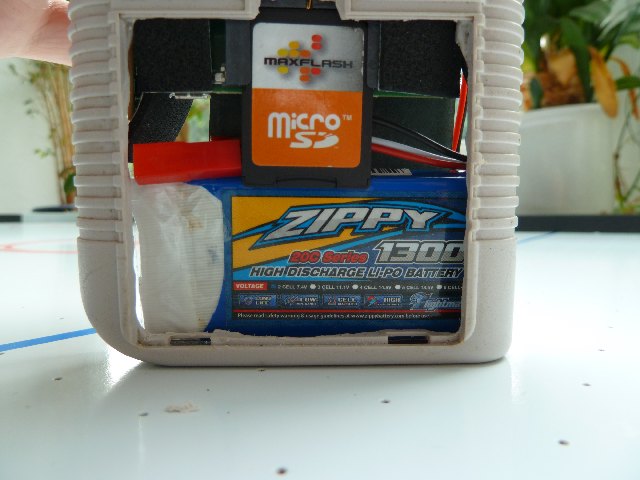
I wanted to have a portable battery powered GamePi. I use a 2S LiPo 1300maH (7.4V).
I was glad that the 3.5" TFT is still working at 7 volts (at about 200mAh).
When I am at a stationary place I can use a 230V to USB power adapter. For mobile short use the internal 2S Lipo will be fine (maybe 1.5 hours). For long time use I am thinking of a LiPo Power Bank with 16000mAh (about 60 Euro) which will give me several hours run-time.
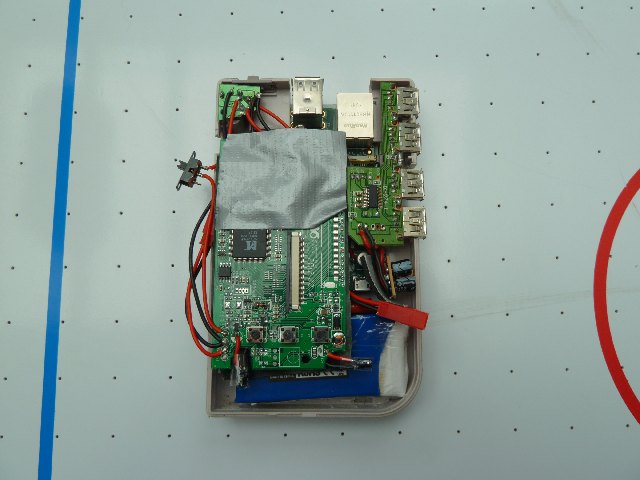
I have used a small 4 port USB hub that is soldered onto the onboard USB port of the Raspberry Pi but without the red +5V wire.
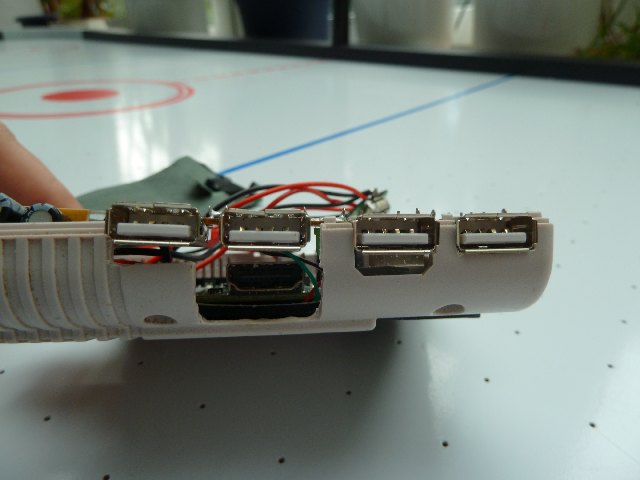
On the second picture below you can see the big opening for the HDMI to VGA adapter.
So inside the Pi, the USB hub and TFT display are powered by the LiPo. The TFT has got it's own power switch (where the contrast wheel was) to save battery. Left next to it is the head phone jack.
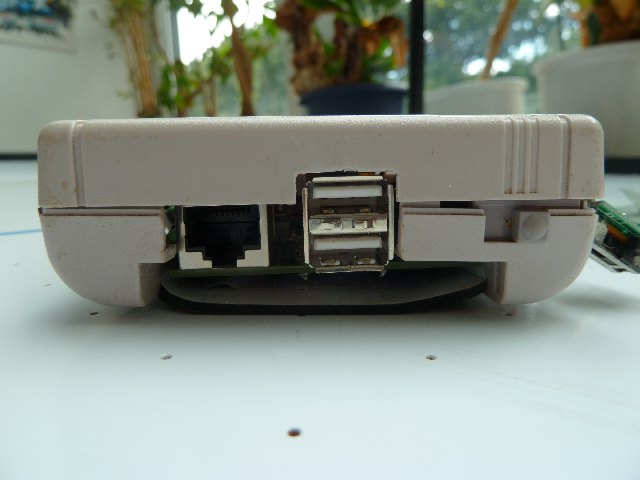
I use the original power switch to turn the Pi and display power on/off.
The SD card and the battery will be accessable through the original battery deck ot the GameBoy. I need to find a good way to keep the battery cover in place.
Latest UPDATE 25.08.12:
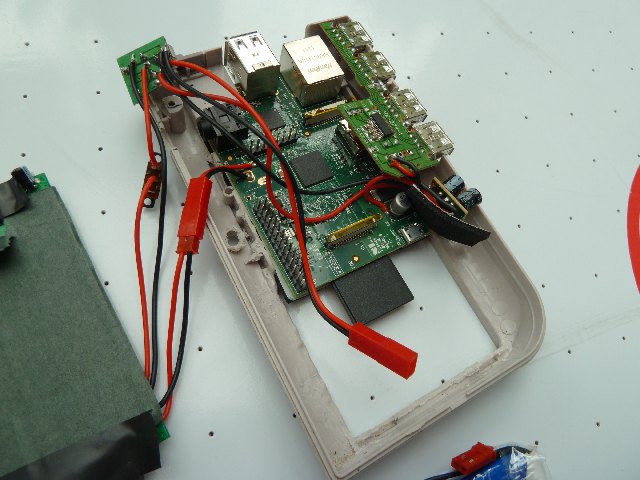
My GamePi is finished now. Here are some last pictures from the inside and the running GamePi.
Build in +5V 2A voltage regulator (78S05) to run the Pi and the USB hub.
I have build a small heat sink out of two postage clamps. That regulator is getting hot.
I have made a showoff and demonstration video for you.
My display config.txt
sdtv_mode=2
sdtv_aspect=1 4:3
overscan_left=-7
overscan_right=-33
overscan_top=-30
overscan_bottom=-30
framebuffer_height=480
framebuffer_width=640
hdmi_drive=2
hdmi_group=2
hdmi_mode=16
Member login
Results 1 to 9 of 9
-
05-08-2012 15:28 #1Member Array

- Join Date
- Jun 2012
- Location
- Bremen, Germany
- Posts
- 5
 Another GameBoy Pi came to life - (Raspberry Pi case mod)
Last edited by GamePi; 05-08-2012 at 15:41.
-
The Following User Says Thank You to GamePi For This Useful Post:
RetromanIE (05-08-2012)
-
05-08-2012 20:37 #2Administrator Array

- Join Date
- Mar 2011
- Location
- Dublin, Ireland
- Posts
- 211,001
Looking very well. You managed to squeeze in a load of things

I know what you mean about the buttons, it's a real pain to accommodate them and have them functional without using a load of space inside the Game Boy.
Looking forward to seeing more and a vid as well..


-
07-08-2012 03:25 #3Member Array
- Join Date
- Jun 2012
- Posts
- 18
Wow, well done. Did you use the same LCD as Retroman? Looking forward to updates

-
14-08-2012 22:44 #4Administrator Array
- Join Date
- Mar 2011
- Location
- Dublin, Ireland
- Posts
- 211,001
Hey GamePi,
Do you want me to sticky this thread? That way more people might get to see it when they come here from google and other search engines..
-
15-08-2012 18:03 #5Member Array
- Join Date
- Aug 2012
- Posts
- 1
Great project
Fab project - glad to see someone doing something crazy with the Pi :-)
The screen... I think I have a similar one... How exactly are you connecting it to the Pi? I'm using the composite video out at the moment into my screen, but I can't see how you'd have room for it in the GB case so I'm kinda assuming that you've done something else.
Could you give us some details?
:-)
--
Mike
-
15-08-2012 20:02 #6Member Array
- Join Date
- Aug 2012
- Posts
- 3
Wow! It looks so complicated!
Hello
Any chance of a tutorial on how to hardwire the usb hub into the raspberry pi? That'd be cool
-
16-08-2012 20:56 #7Member Array
- Join Date
- Jun 2012
- Location
- Bremen, Germany
- Posts
- 5
Thank you for all the nice comments.
@camer0n
I can't tell if that is the same LCD. I have not seen any inside pictures from Retroman to compare.Did you use the same LCD as Retroman?
@Retroman
Yes thank you. You can sticky it.
I hope I can work on the finishing the next week.
@recantha
How exactly are you connecting it to the Pi?
I'm using the composite video out too but I have cut off the yellow connector and soldered the signal and ground wire directly to the LCD board.
Reason for cutting: the yellow connector was too high and I could not close the Gameboy housing.
@Sgt Sideburns
I have checked the voltages on the four pins. On the Pi USB port and on the seperate powered USB hub to know which wire connects to which pin.Any chance of a tutorial on how to hardwire the usb hub into the raspberry pi?
You don't use the +5V wire from the hub to the Pi because it would power the Pi and could damage the SD card.
I had that problem and the card did not boot anymore (red LED on Pi only).
Another card worked without any problem.
-
20-08-2012 20:17 #8Member Array
- Join Date
- Aug 2012
- Posts
- 3
 Erm, ok . . . .
Listen man, I'm not gonna sugar coat it- I am a n00b of epic porportions, with the soldering-know-how and logic of a dead-jew-monkey with no family. Could you give me the "For Dummies" version?
-
25-08-2012 21:14 #9Member Array
- Join Date
- Aug 2012
- Posts
- 3
No Worries
No Prob Man.
Good Job!!


 Reply With Quote
 Posting Permissions
- You may not post new threads
- You may not post replies
- You may not post attachments
- You may not edit your posts
Copyright 2010-2024 - Retrovia.org
All times are GMT. The time now is 23:57.

Bookmarks